USSD PORTAL (VOTES) *141*8#
Configuration on Further Market Business Account Interface
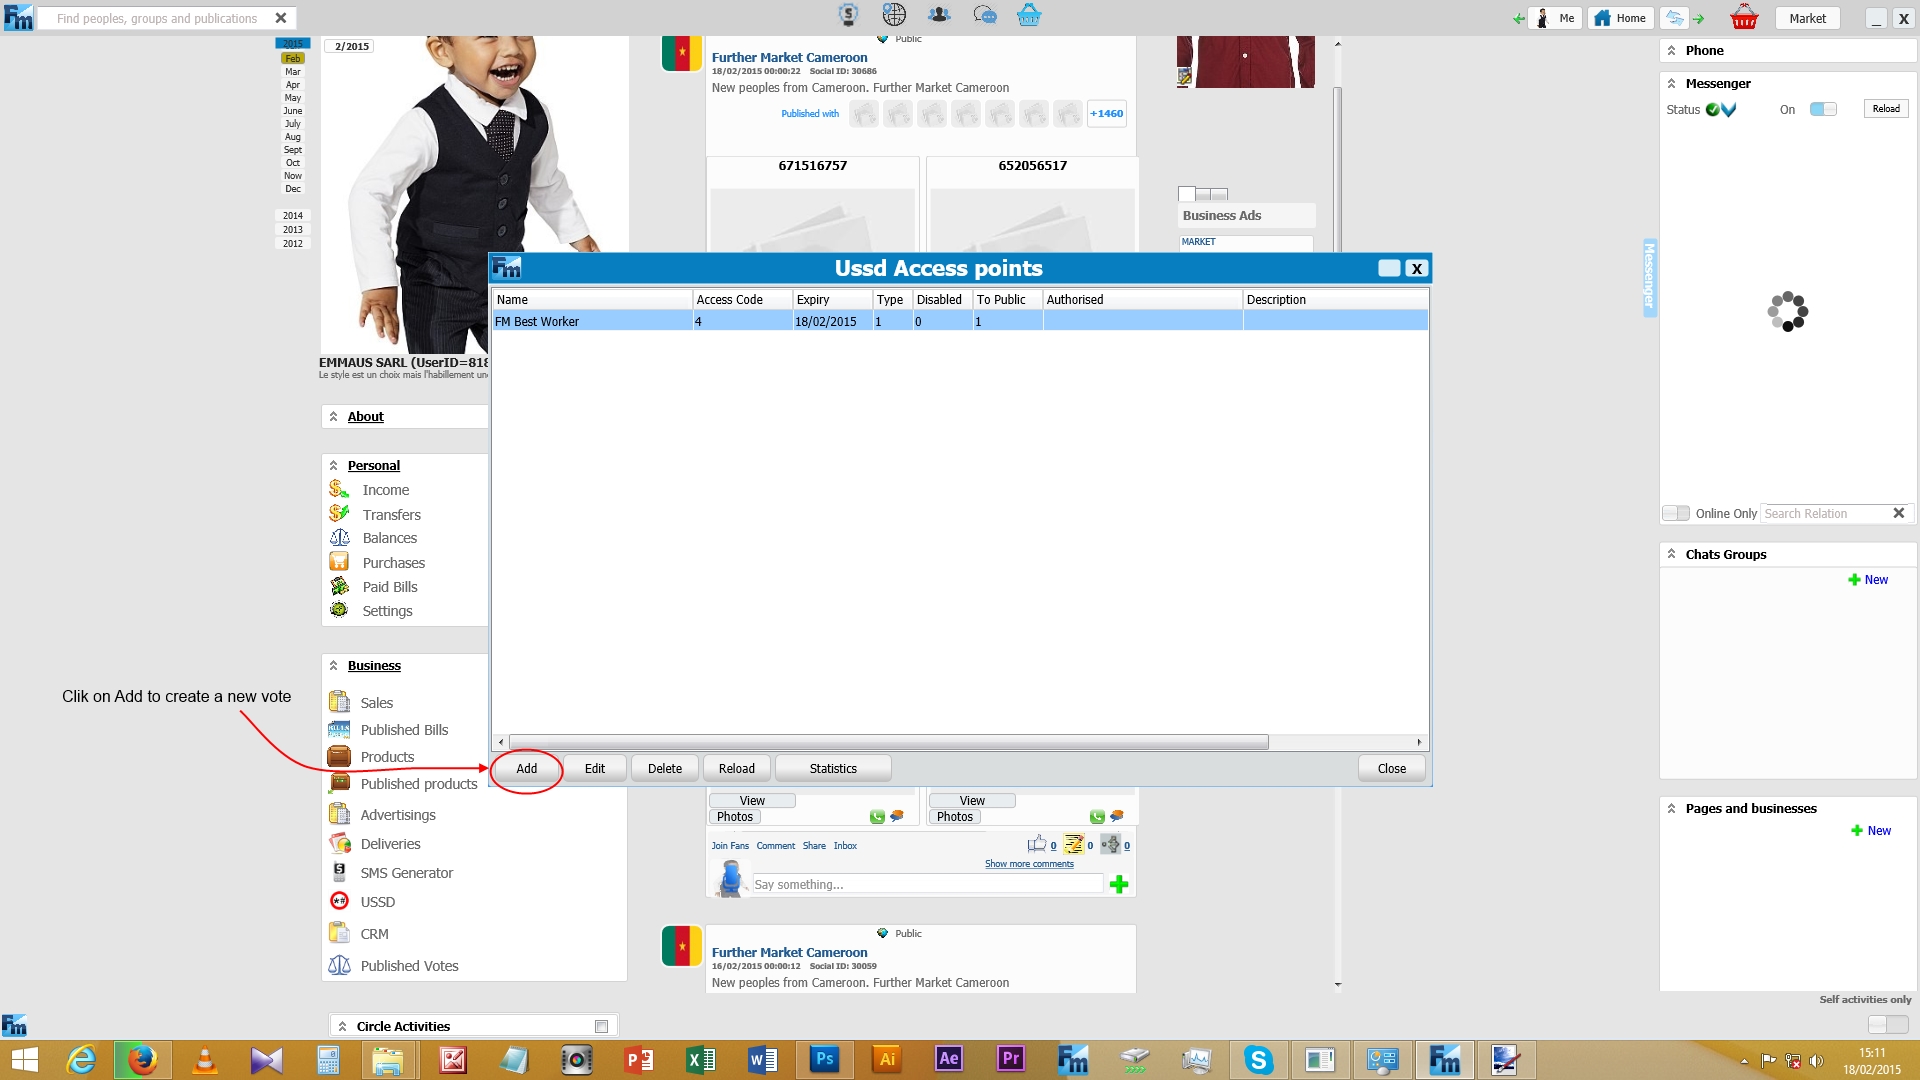
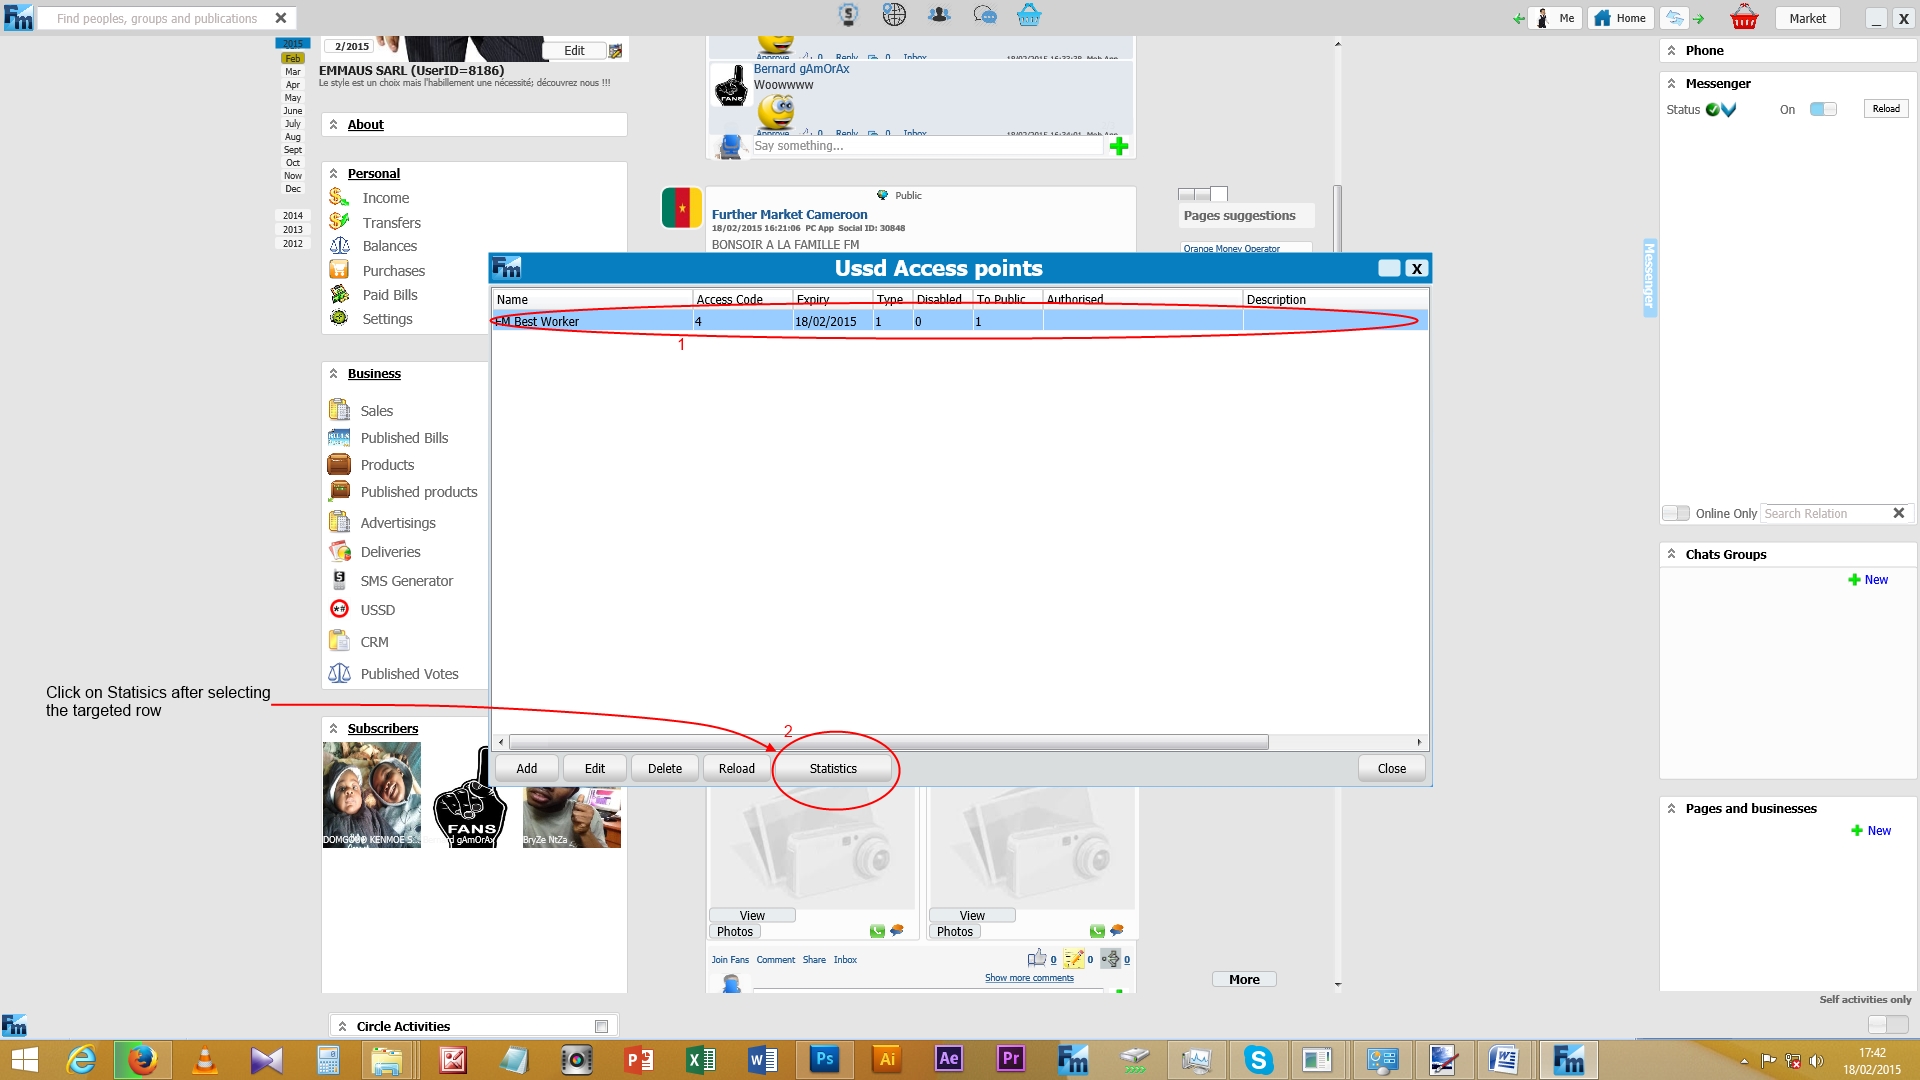
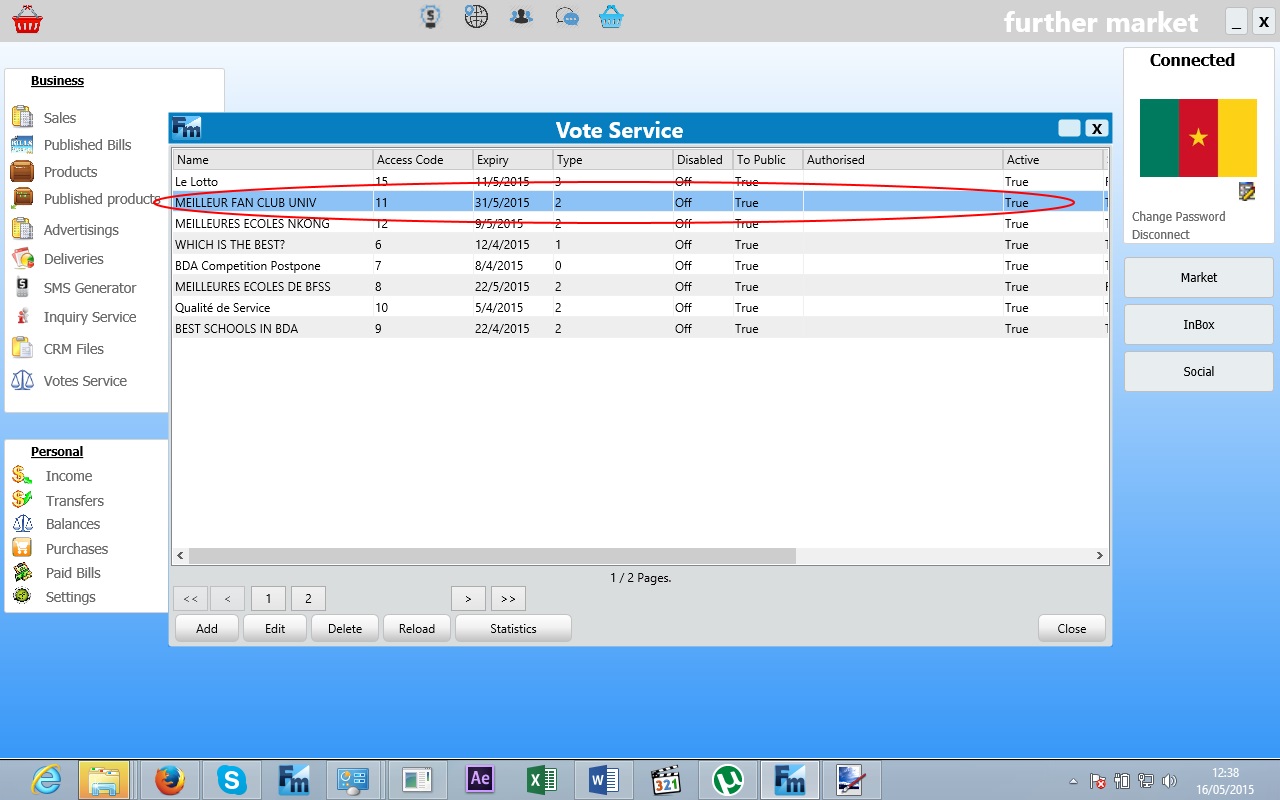
1- Invoque the USSD Access point form
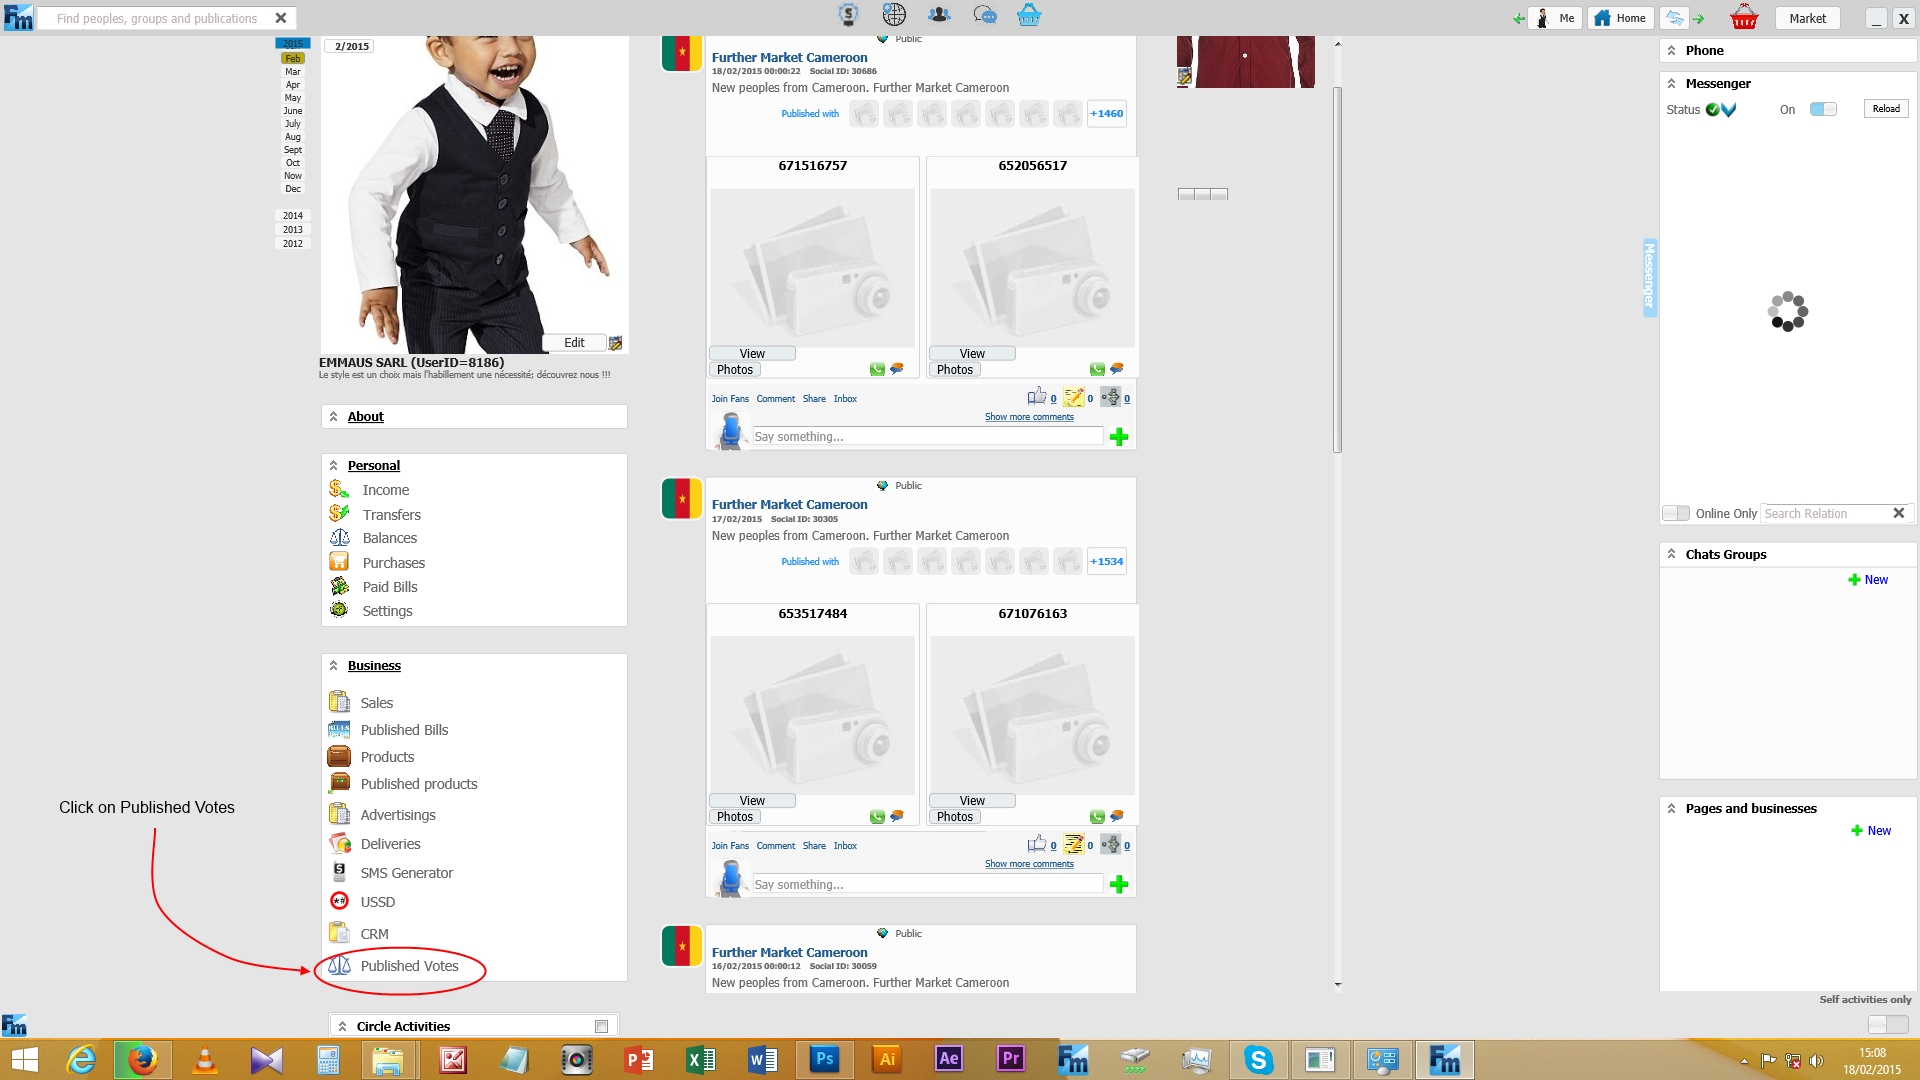
2- Clic on ‘Add’ to access the Vote Form
3- Configure your vote, verify and save. Note that you can only activate the service after the first saving process.
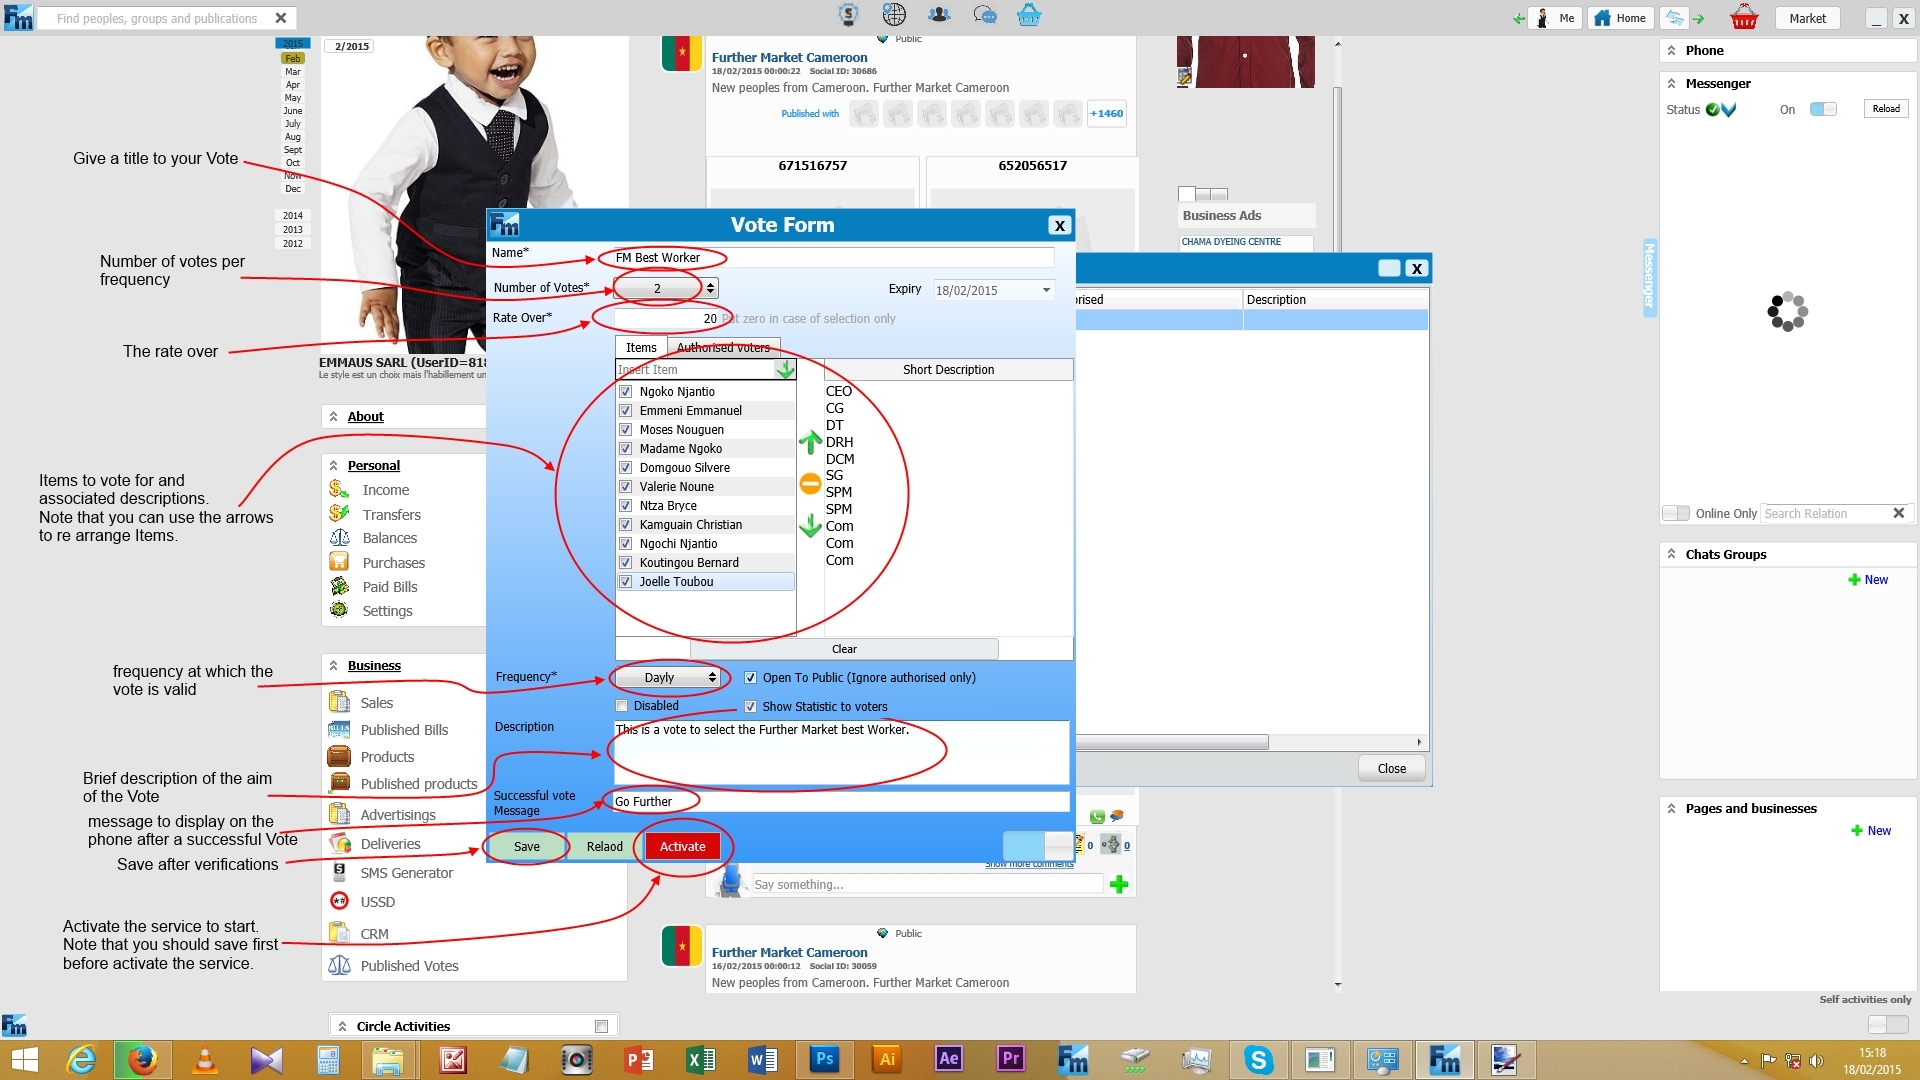
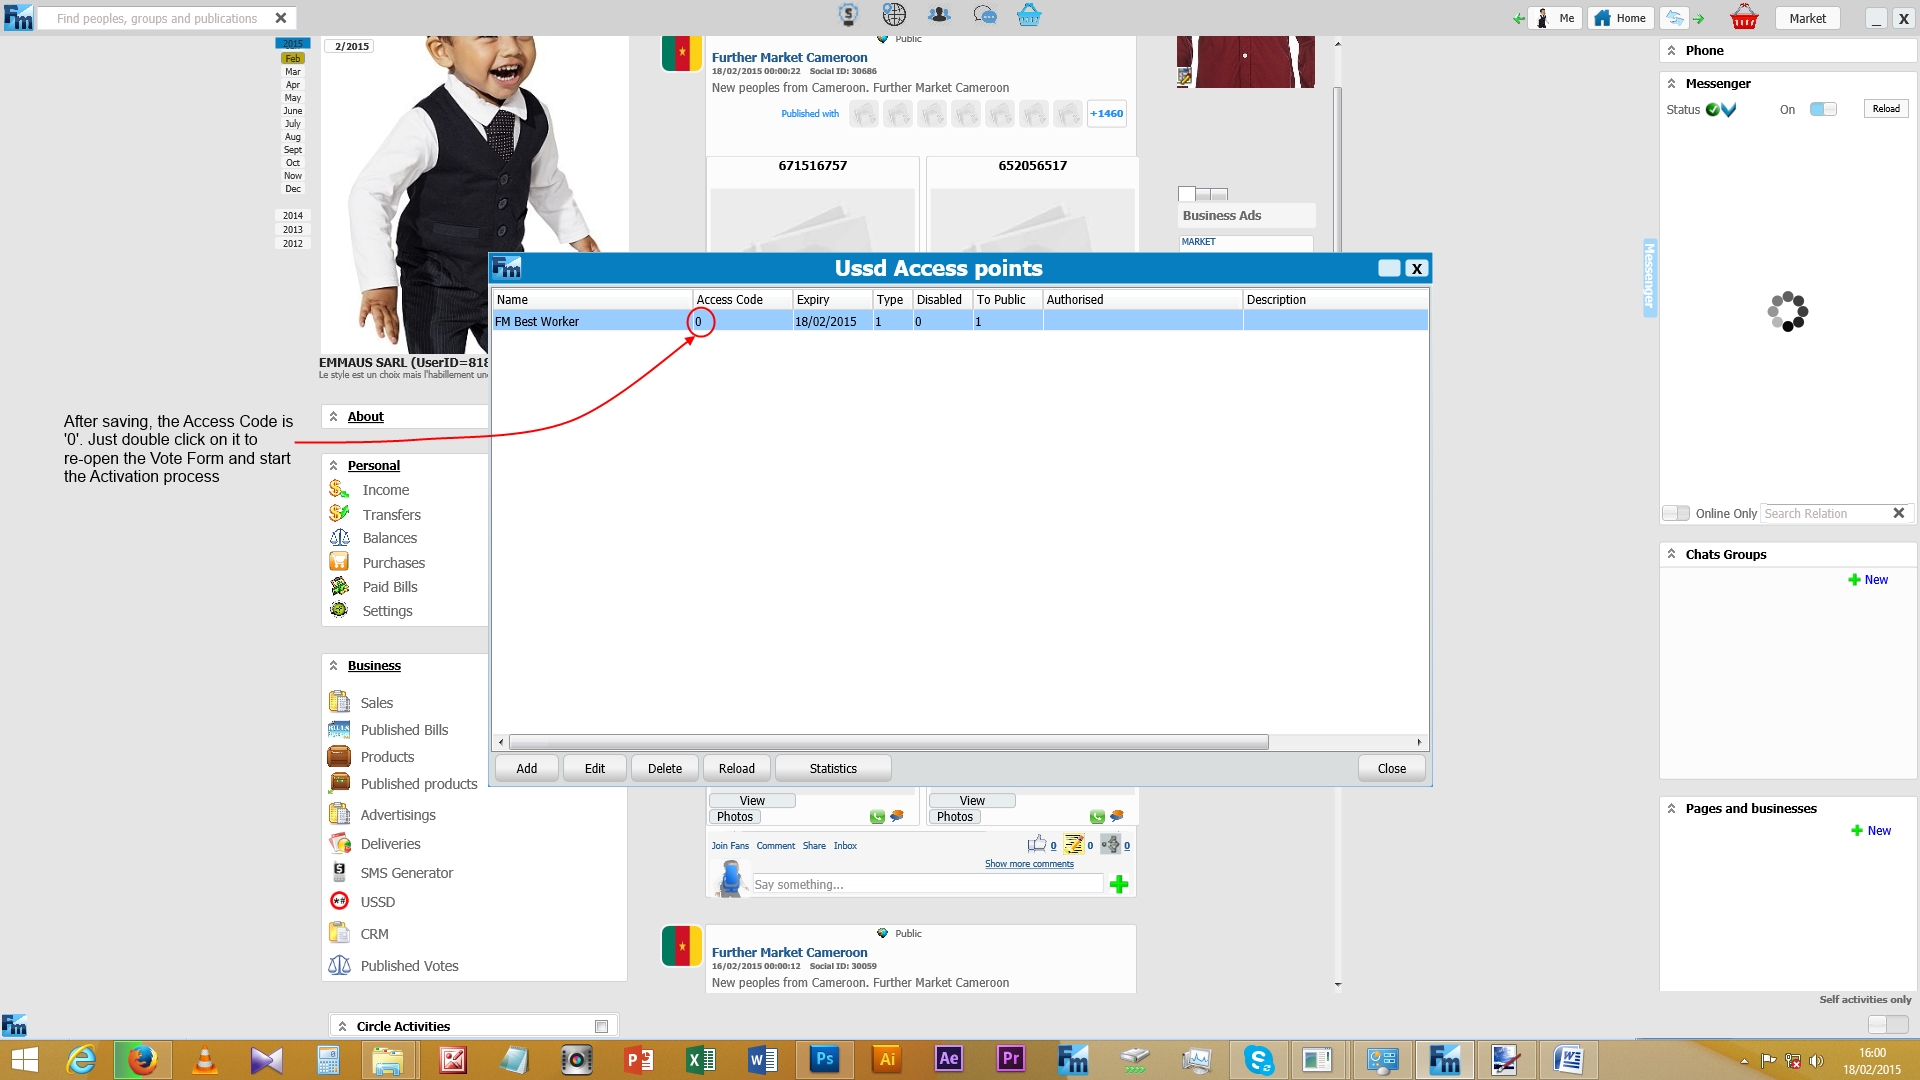
4- After saving the vote form, the acess code is set but innactive. This prove that the service is ready for Activation.
5- The Service Activation form is launched after click on Activate from the Vote Form. The user then fill the form and Activate the Service.
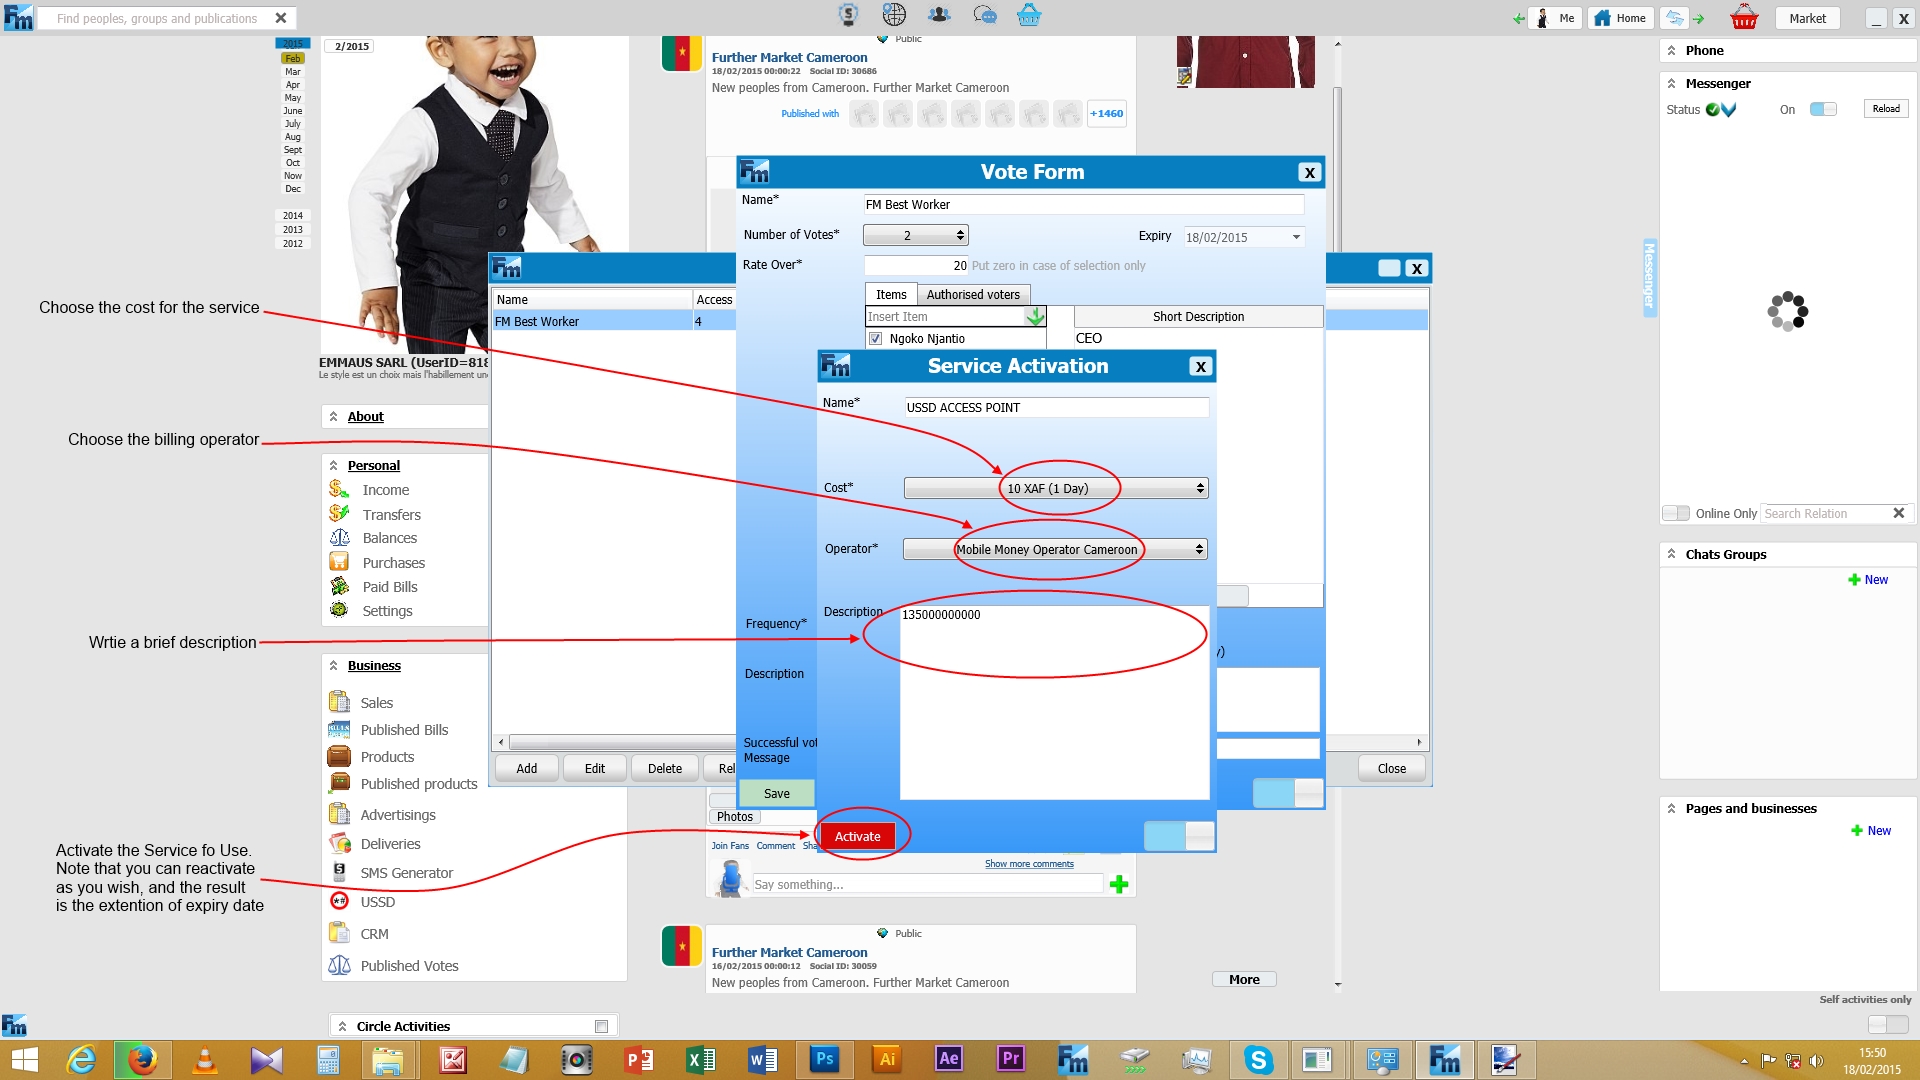
6- On successful activation, the Access Code is Generated.

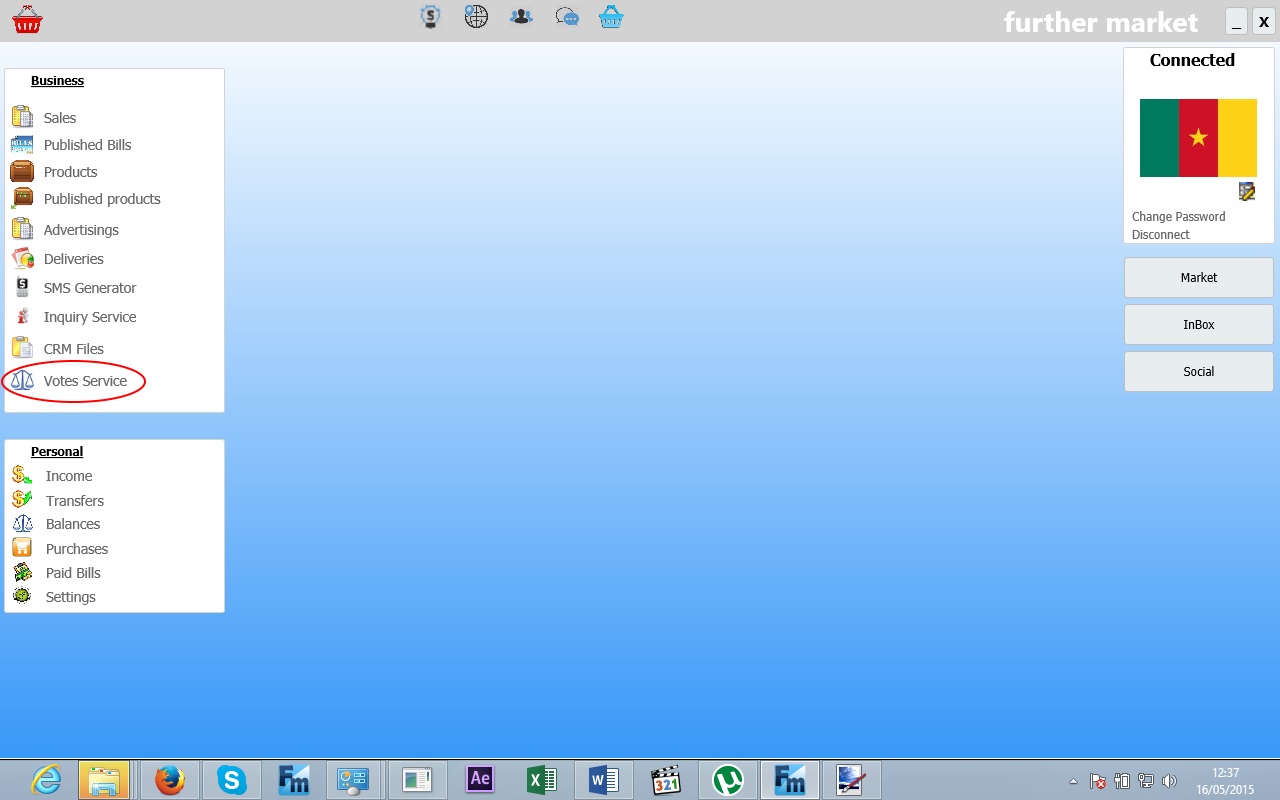
Access of the service on the USSD portal
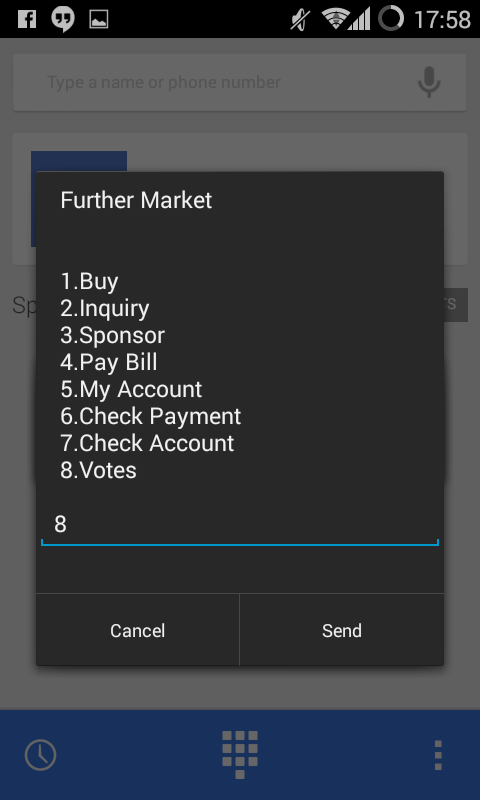
Dial *141# to enter de Further Market Portal

You obtain this menu
If you want to vote, choose Option 8 and click “Send” to validate.
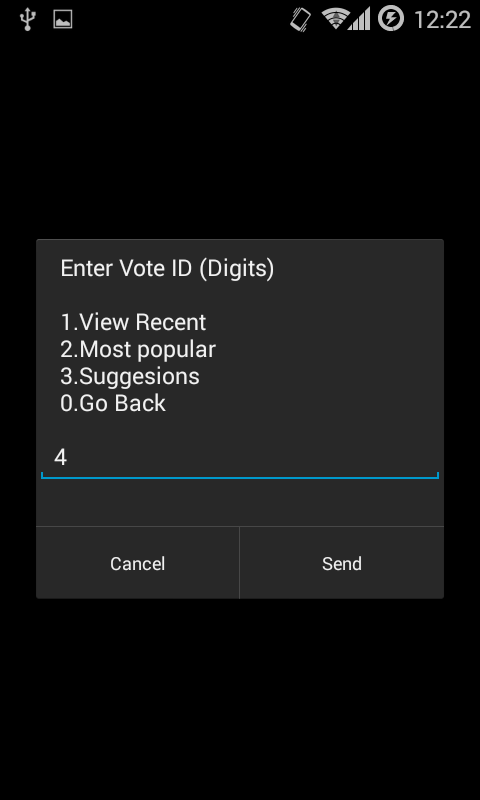
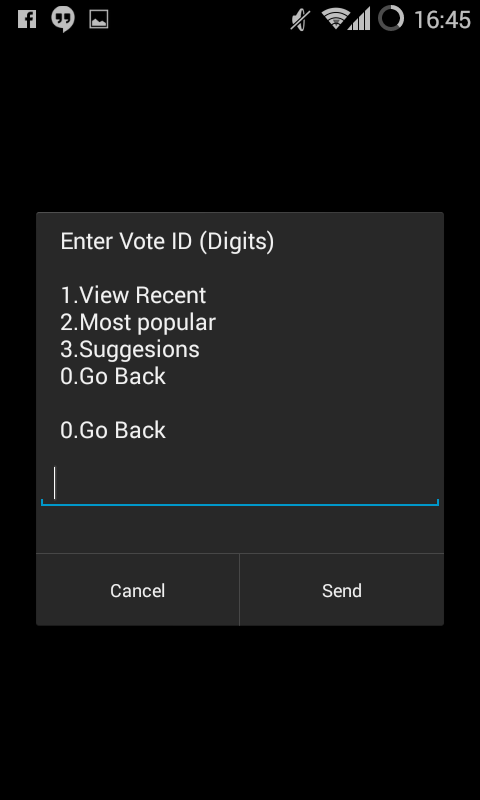
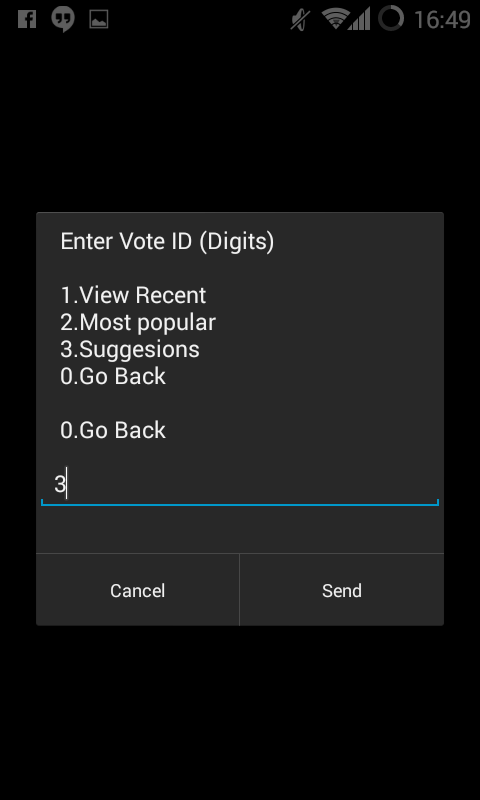
As an example we entered the vote ID 4.
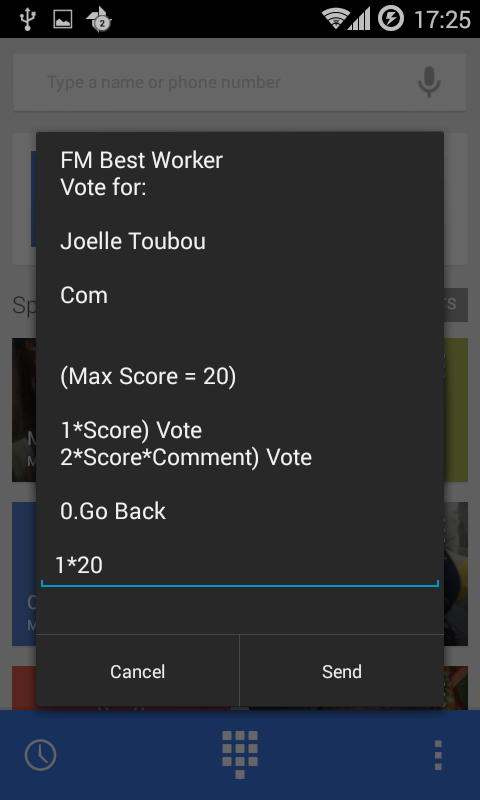
As we can see, EMMAUS Sarl has initiated a vote for the FM Best Worker. Actually we may want to place a vote for the numbe 11 of the list
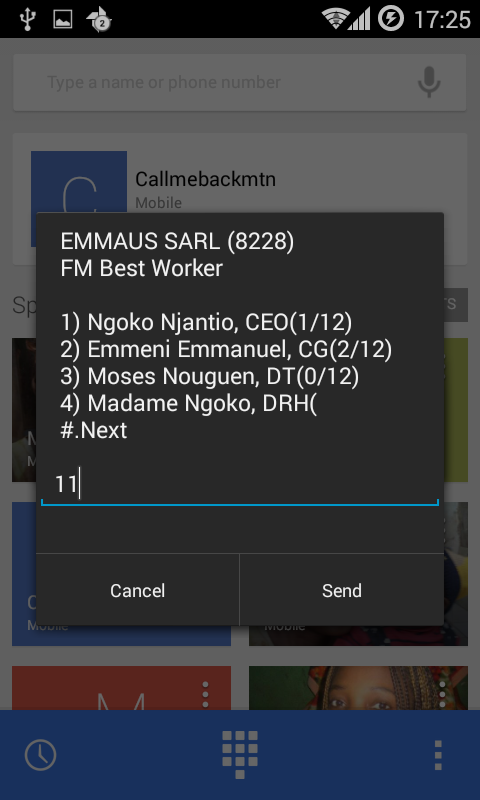
The choosen Item is dislayed and you are prompted to vote .
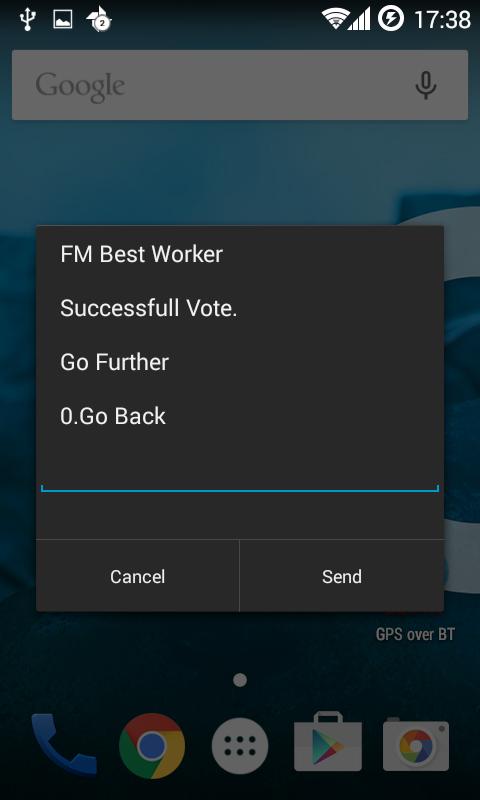
On successful vote the status message is displayed
Note that You can view recent vote by choosing option 1. The most popular by choosing 2. The Suggestion by choosing 3. From the enter Vote ID Menu.
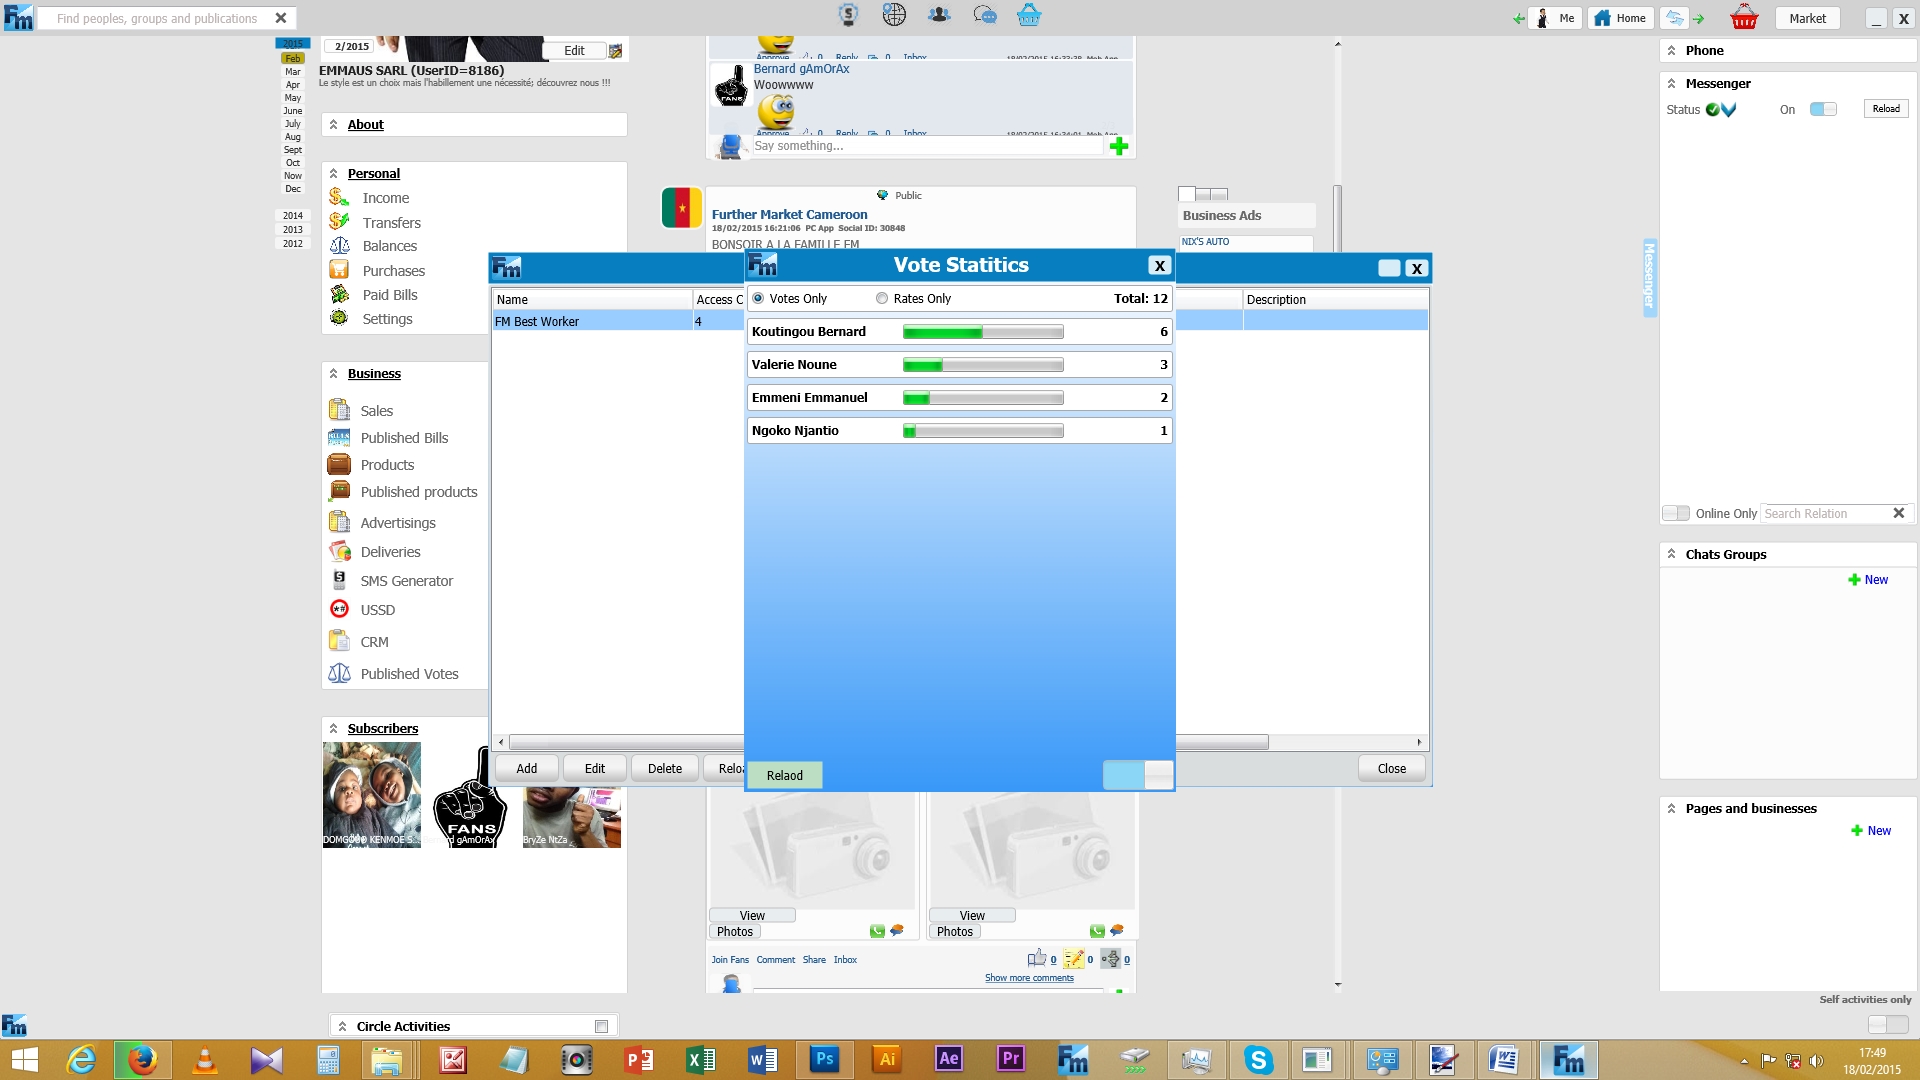
View results of the Vote
Results are displayed
Remark: At any point of evolution inside the USSD structure, you can use Option “0” to “go back” from one level to the previous. By the way, you can select “Cancel” to override the whole process.
Billing
The billing process of this service can be set by configuration as shown below:
1- Clic on the targetted service
2- Highlight and double clic the service for edition
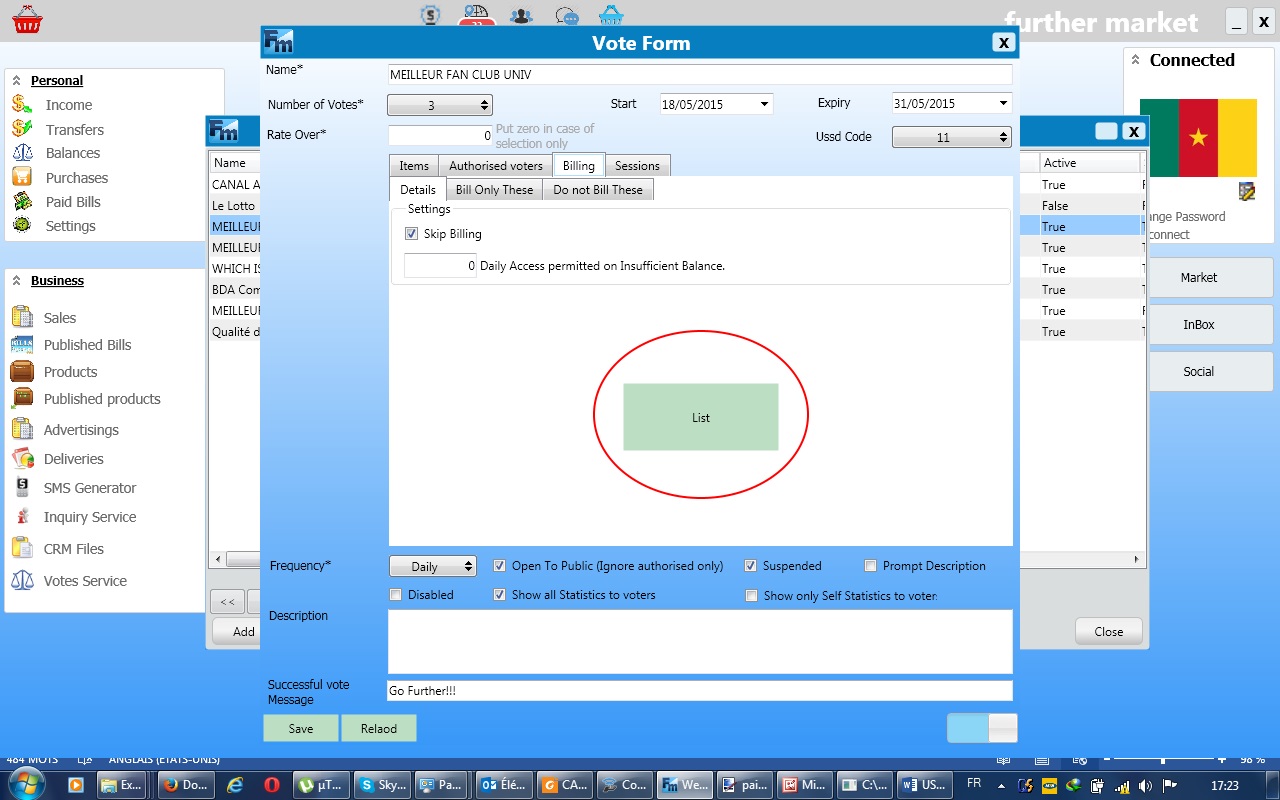
3- Select the billing tab and setup as required
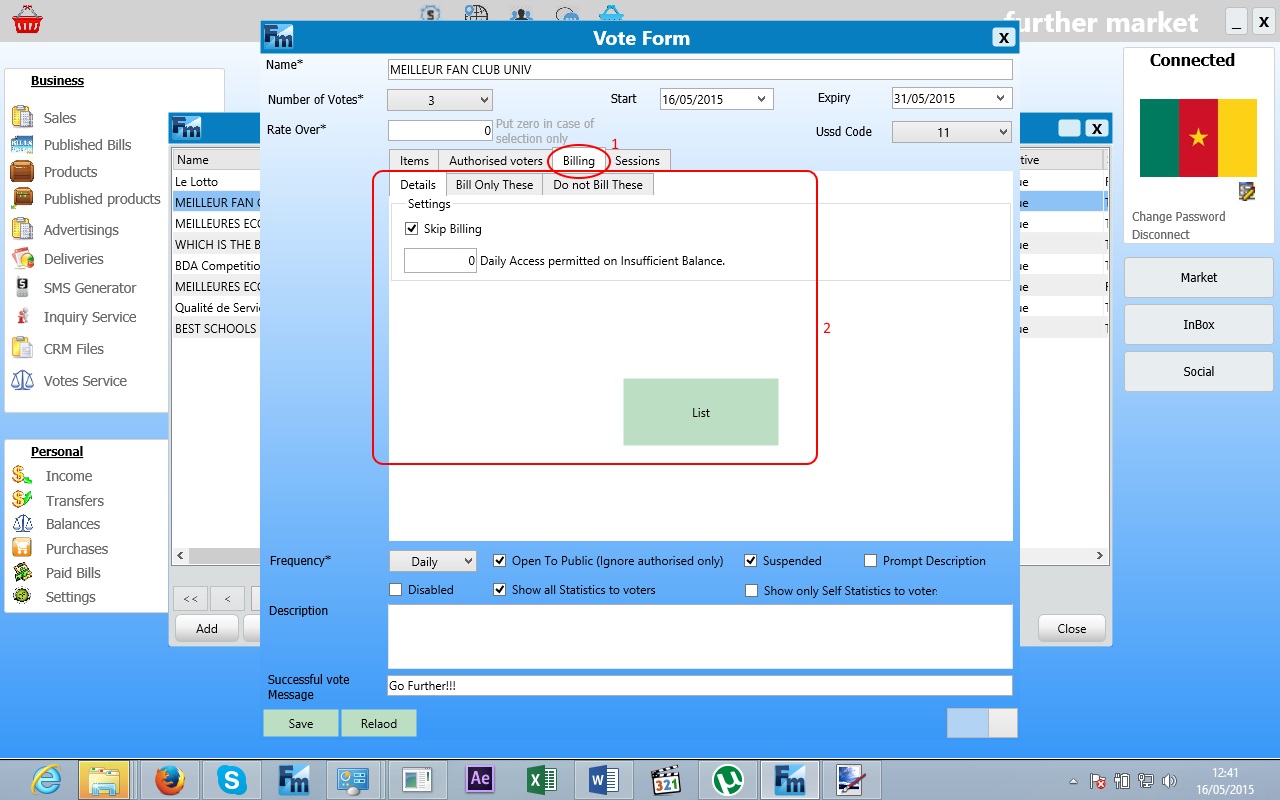
4- Clic on “List” button to create the billing list or to access and edit an existing one.
5- For this example, we are creating a billing scheme from scratch. So we clic on Add to proceed.
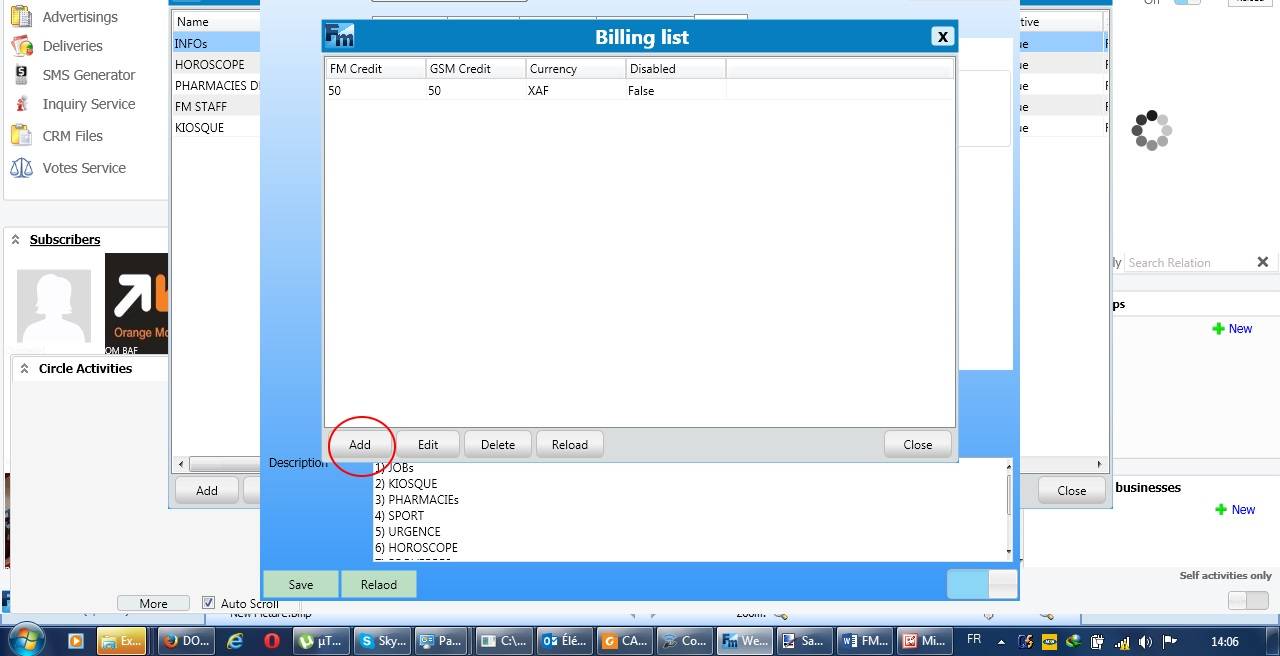
6- The service billing form will pops-up to allow customisations of the billing scheme.
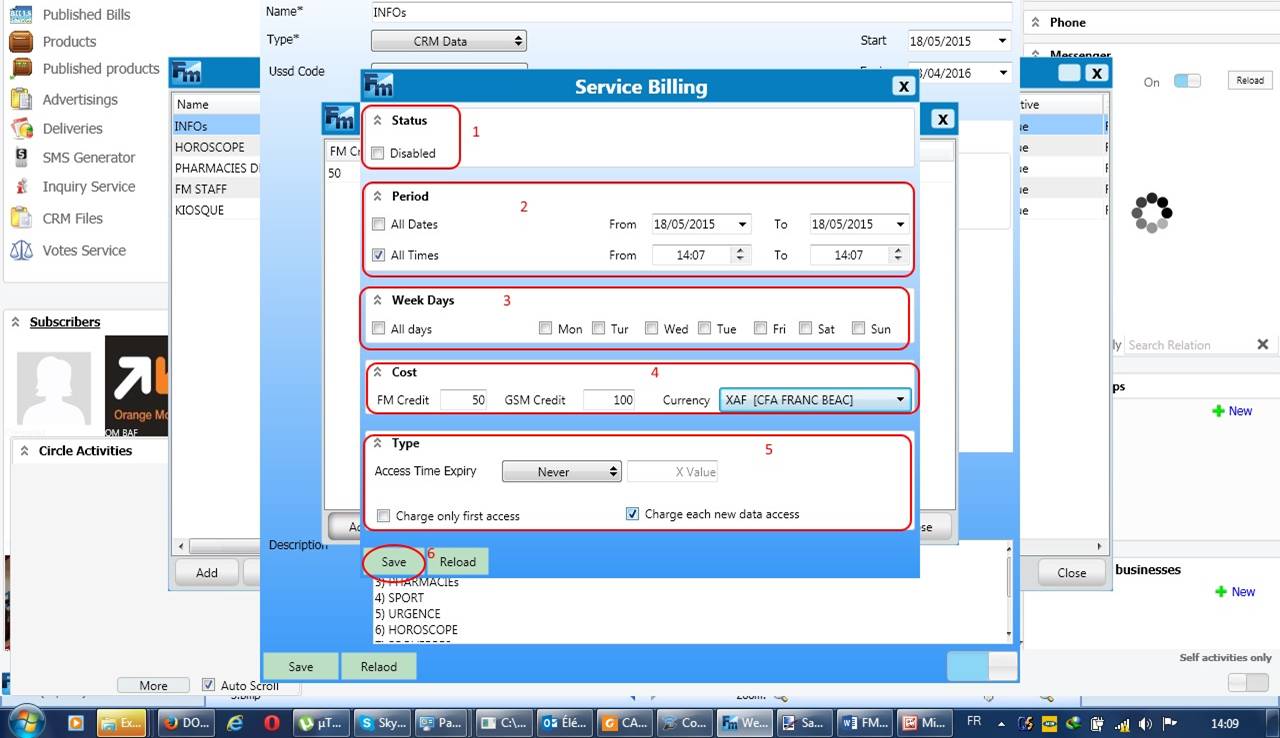
- You can deactivate the billing status(1)
- Set the billing period(2) and even days of the week at which it is applied(3)
- Set the cost of the service in a particular currency. Note that you can specify the amount to be deducted from FM account or GSM one, having in mind to the priority is given to the FM credit(4).
- You finally set the access time expiry, and the way the user will be charged ( 1st access / each new data access )
After those settings, make sure that everything is as per required and clic on save. That’s all for the billing procedure.